X-MAKER User Guide

Resource

How-to Video

FAQ

Resource


How-to Video

Unboxing the X-MAKER
Get started with X-MAKER App
X-MAKER 3D printer Quick Guide
Use and Purchase of Filaments
Maintenance Guide for X-MAKER 3D Printer

Frequently Asked Questions

1. How should I start with X-MAKER?

➊ To get started with your X-MAKER, you should download the latest version of X-MAKER App first. It is available either in the Apple App 

Store, Google Play Store or here.


➋ Then decompress the file after the download and install it on the device(PC/Android tablet/iPad) you prefer to use.


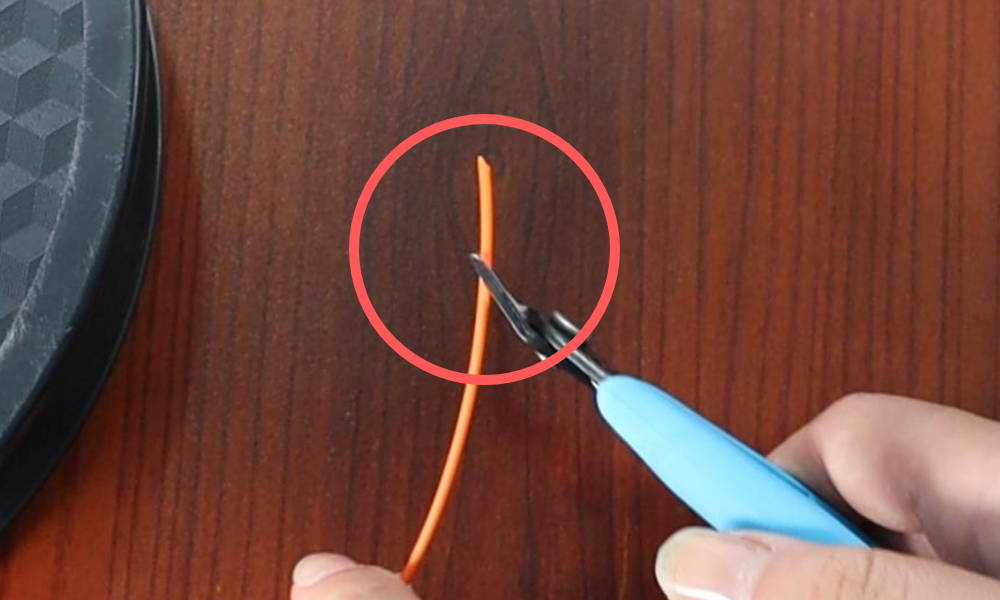
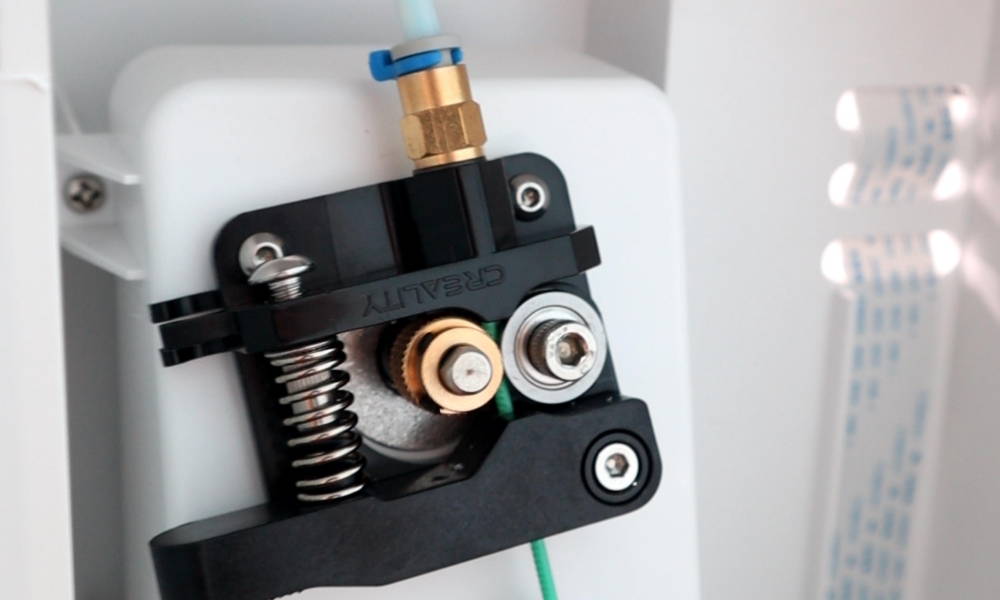
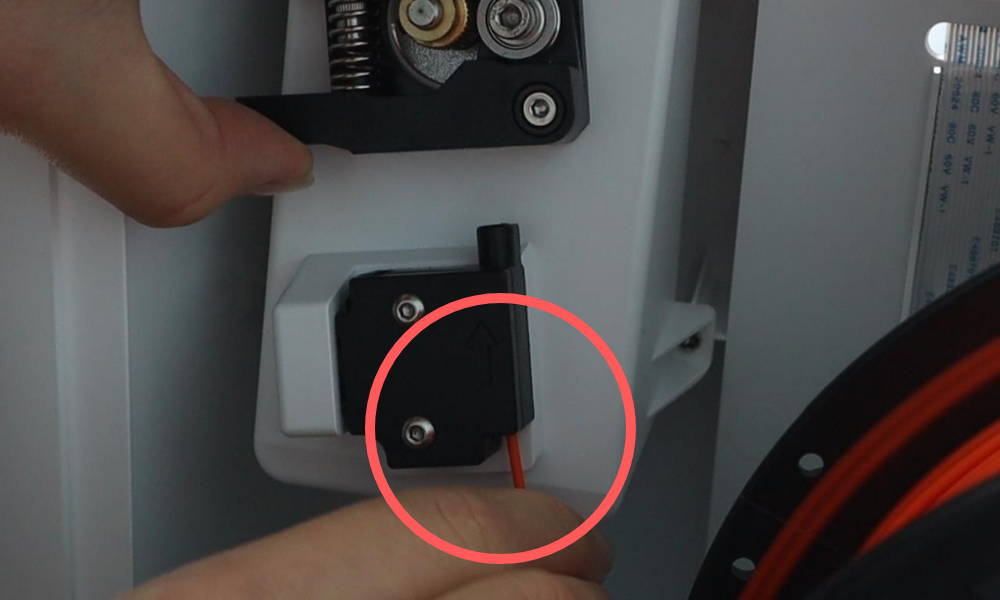
➌ The next step is to power on your X-MAKER 3D printer, connect it to your device, set the print and load filament. You can find the exact 

step-by-step instructions here.


➍ After everything’s setup, you can now open the X-MAKER App or the software on your PC to create your AOSEED account. You may also 

login with your Google/Facebook account directly without registering an account. 


For more information you can download the X-MAKER user manual and check it out.

2. Does X-MAKER 3D printer have parts replacement?

We offer a one-year limited warranty for all the products we sell. If you need to purchase replacement parts, please contact the customer 

service here for a quote.

3.Can I use other slicers with X-MAKER, such as Cura, Prusa or Simplify3D etc.?

Sure, you can. Except for X-PRINT Slicer and the slicer of One-Press-Printing in X-MAKER App, X-MAKER 3D printer is also compatible 

with other slicers. But you need to adjust some parameter settings, please download this file to adjust the related settings, or contact 

the customer service for help.

4. What filaments can be used with X-MAKER V4.0 3D printer?

X-MAKER 3D printer supports PLA and ABS filaments currently, our develop team is working on developing more supportive materials, keep 

following up with us.

5. Is the ABS filament safe to print?

ABS filament gives off very little poisonous gas when heated up. If you’re still worried about the safety, you can put the X-MAKER in a well-ventilated 

room when printing ABS.

6. What kind of materials do you recommend for a safely printing?

We suggest printing non-toxic PLA filament when it is used to print for children. You may check out our AOSEED Silk PLA filaments in our store.

7. How should I load the filaments correctly?

To load the filaments, please follow the instructions below:
① Cut off the useless part at the top first.
② Then put the end of the filament through the small hole in the spool to prevent winding.
③ The next is to put the opened spool in a resealable box or bag and put them in a cool and dry place.

8. How should I replace the filaments after loading them?

To replacement of filaments includes loading and unloading two functions:

① After extruder heating is completed, filament will be unloaded and pulled out according to the instructions above.

② Insert new filament into the inlet intake and feeding wheel. New filament will be pushed into the extruder.

③ Replacement will be completed when the new filament comes out of the extruder.

9. How to create my own 3D design with X-MAKER App?

To create your own 3D design, you must first login into your AOSEED account, so that you can save your design work, design changes, etc., without 
losing them.

⓵ Open X-MAKER App/Software on your device and login into your AOSEED account.


⓶ Choose “Theme” or “Design” module to do something creative and fun.
                      Module “Theme”: 15 built-in mini applications to help users create 3D models.

                      Module “Design”: 2 professional 3D design software to work advanced.

(More instructions are demonstrated in our X-MAKER App tutorial videos)


⓷ When you finish your design work or take a break, you'd better save your work local by clicking icon “save”, or save it in your AOSEED account by 

clicking icon “upload”.


⓸ Your work can be found in your account under “My Works

10. Can I lose the raft before printing my 3D work? Is it a must?

It depends on how you do it. If you are going to 3D print with X-MAKER App and use One-Press-Printing to slice your model, then it cannot be 

removed. However, you can remove it by using our X-PRINT slice software.t

11. What can I do to avoid filaments sticking and the nozzle clogged?

1)Increasing the printing temperature appropriately for the filament you used may require a higher temperature.

2)It is recommended to use AOSEED filaments, or other filaments with adjustable printing specifications.

3)Store the filament spools properly to minimize moisture absorption. They can also be put in a dehumidifier if possible.

4)Clean the nozzle and do maintenance for the 3D Printer regularly. Here is a tutorial video about nozzle maintance.

12. Why is my 3D printed prints NOT sticking to the BED/Baseplate?

There could be couple of reasons not having a good first layer adhesion. To avoid this, here is something you can do:

- Check if the model base is contacting too less surface to the bed/baseplate, seen in the left picture below.

- Check if the model is not contacting to the bed/baseplate at all but floating up, seen in the middle picture below.

- Check if the model base is contacting enough surface to the bed/baseplate, the correct position is seen in the right picture below.

You should know, no matter where you get the models, it will always be at the right position automatically, unless you've done some changes in 

canvas, then you need to click on "Place on Baseplate" to set it right.

13-1. How should I know if the nozzle is too CLOSE to the bed/baseplate, a.k.a. the distance between the nozzle and the bed/

         baseplate is right for printing?

If the nozzle is too close to the bed/baseplate, the filament will not be able to come out, or the extruder could damage/drag the previously printed

 layer. So we had better adjust the position before the printing. Here are some steps to check if: ◎ the nozzle too CLOSE to the bed/baseplate


The nozzle is too close to the baseplate, it is scratching and damaging the baseplate.

There is no material coming out of the nozzle because the baseplate is blocking.

We can see so little space between the nozzle and the baseplate. No material anywhere on the plate. 

Here we can see all the scratches from the nozzle to the baseplate, that's also why the printing failed.

13-2. How should I know if the nozzle is too FAR from the bed/baseplate, a.k.a. the distance between the nozzle and the bed/

         baseplate is right for printing?

If the nozzle is too far from the baseplate, the filament will not properly place on the bed and will not be able to adhere. 

So we had better adjust the position before the printing. Here are some steps to check if:  ◎ the nozzle too FAR from the bed/baseplate


The nozzle too far away from the baseplate causes the material coming off.

The prints cannot be sticked on the baseplate, some prints that are sticked on will be dragged away.

The prints which are sticked on the baseplate will also be damaged by the nozzle so far away.

We can see the prints which did come out of the nozzle are not consolidated and get broke.

14. How can I improve my prints?


There are so many things to improve the 3D prints. Here are several things might help you:

1. Better use the same brand of filaments

2. Experiment with print temperatures(nozzle, bed)

3. Leveling and Calibration

4. Heating up the bed a little more

5. Upgrade of Extrude (distance, speed, etc.)

6. Tweak print speed and retraction settings

7. Try sanding or polishing them

8. Adjustment of Printing parameters

X-MAKER Troubleshooting

1.The extruder keeps having noise

This happens when the filaments aren’t loaded correctly, sometimes the clogged nozzle could

also cause this problem.

2.Unable to print with a clogged nozzle

To unclog the nozzle, please notice the tips below:

1. Preheat - heat up the extruder to 200

2. Check whether the filaments are bent or better to pull out

3. After heating is completed, the knob will be melted and come out of the inlet.

4. If it’s not improving, please replace the nozzle by following the inspection video here

3.Unable to turn off the lights

Use the touchscreen and go to “Setting -> Control -> Internal / External” to control the lights.

4.Unable to turn on the Child-Lock

Child lock is a considerate design for families who carry out STEAM education. It can prevent print stop or other problems caused by mistaken touching from children.

The screen will automatically lock after 30 seconds in this mode. Enter password again for the following operation.

5.Unable to heat up the nozzle

(1) Check if the Flexible Flat Cable is loose. Gently fasten the cable, then restart the 3D printer. (It is forbidden to plug cables when the power is on.)

(2) If the above operation doesn’t work, please consult our after-sales customer service.

6.Extrusion Problems

1) Check if the extrusion motor is working properly. If not, please consult our after-salescustomer service.

(2) Unload the filament, cut off the tip of it, then straighten the top and load the filament again.

(3)If the filament can't outflow normally after reloading, heat up the nozzle and set the temperature to 250 degrees, then insert the nozzle cleaner into the nozzle and move it up and

down for several times until the nozzle is cleaned up. After that, repeat the loading operation.

(4) If there are leftovers in the tube, pull out the tube, remove the residue inside and feed again.

7.Filament Error Sensor (FES) Keeps Alarming

● Check whether changing the filament is required. If not, please unload the filament first

and reload it.

● If the FES still alarms after reloading, please use the touchscreen and go to ‘ Setting ->

Control -> FES ’ to turn it off. In this case, the FES may be damaged and needs

repairing.

● If the tip of the filament is over piled up or over-warping, it will get stuck at the filament

error sensor when unloading, in which the FES will be damaged with the filament being

violently pulled out. To prevent it, you can use pliers to cut off the degraded part when

the filament is unloaded between the extruder and FES, then continue the unloading

operation.

8.Unable to remove the support and raft

You can solve this problem by setting the ‘Wall line count’ to 0 in Expert Slice Setting, while it

may increase the possibility of whiskers.